Planning on building your own bunkie while camping? Here’s a day-by-day breakdown of what we did, plus some helpful tips and tricks.
This is part of a series of posts on how we built our shabin (shed+cabin). You can find all of the posts here.
Building a bunkie
We were incredibly fortunate to have our friend, Mikal, help us with building our bunkie.
Mikal is a construction foreman for Hollywood productions. Because of pandemic-related studio shutdowns, he happened to be available to help us build our bunkie. He gets credit for the speed of our build. He knew exactly what to do and when to do it. And since he’s used to working as part of a team, he was also great at coordinating everyone else.
The work camp
Since we were building on an off-grid property, we camped while building the shabin.
The kids and I did all the cooking and dishes so the other adults could focus on building. I cooked large breakfasts and dinners. Set out a make-your-own-sandwich buffet for lunch. And we had plenty of after-work beer and ukulele around the campfire.
The only thing that we didn’t have (which we really would have liked) was a real shower. Our solar shower just wasn’t that great… mostly because it wasn’t a sunny week.
Otherwise, we were all happy campers!
A DAY-BY-DAY BREAKDOWN.
Before we got started, I really wanted to know more about what it was like to actually build on an off-grid piece of property. There are a lot of photos of tiny homes after they’ve been built. But not a lot of what it was like to build in a remote location.
Here is a day-by-day breakdown of what we did.
DAY 1: GETTING SUPPLIES TO THE BUILDING SITE
Coordinating the delivery of building supplies was a bit tricky. In the end, we rented a 17-foot moving truck and delivered them ourselves.
I’ll admit it was tricky to get everything to line up.
- The lumberyard needed to have our order completed and bundled up on the morning of our truck rental.
- Our order included everything we needed for the build, including the siding and roofing.
- We had to work with the ferry schedule to unload the truck and then head back for the return.
- Unloading 50 sheets of plywood and 110 2X4s from the back of a truck took a significant amount of time. And after all of that, we had to set up our campsite. It was an exhausting day.
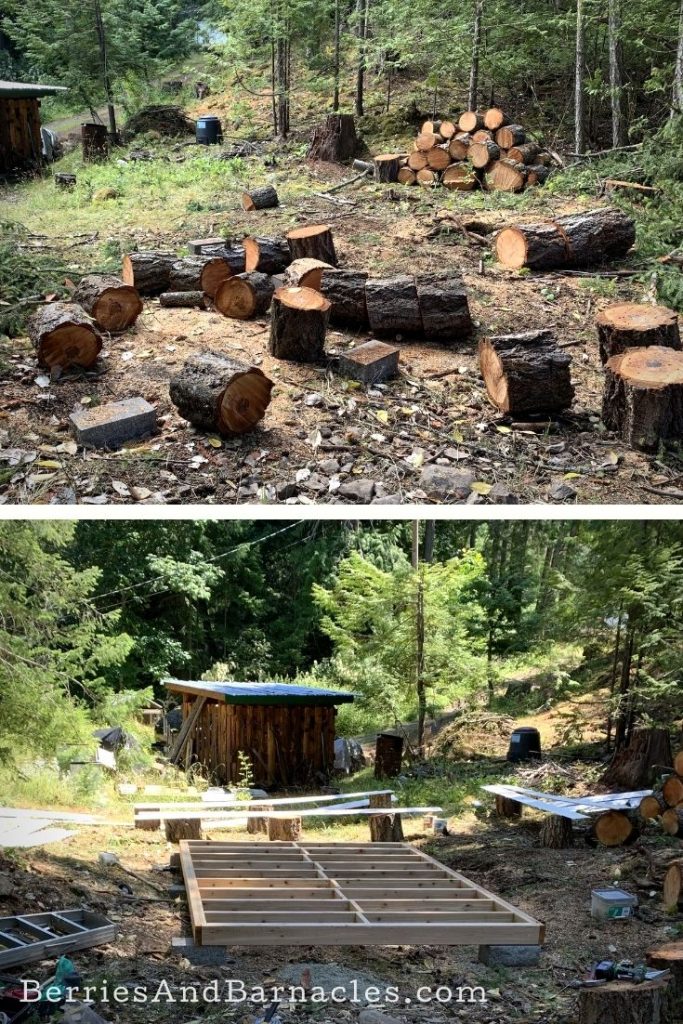
Day 2: Building the base
We started the second day by clearing the building site. (See the photo at the top of the post). We had already made the foundations, but we had hired someone to take down two risky-looking trees and the area was covered in bucked logs.
The rest of the day was spent building the floor, which would provide a base for building the rest of the shabin.
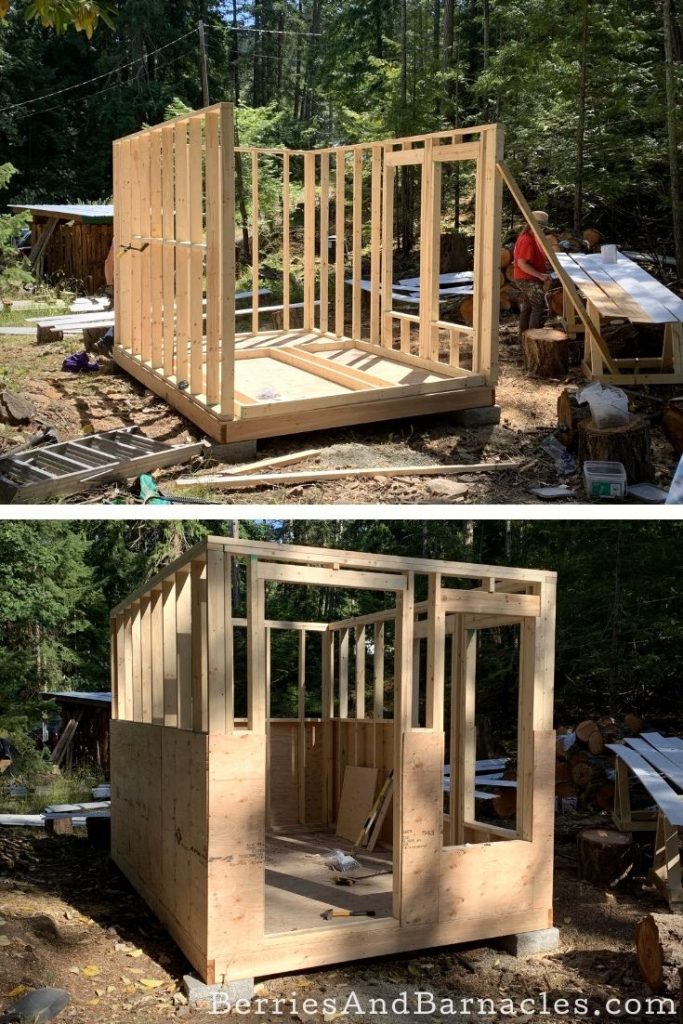
Day 3: Framing walls
By the end of the third day, all the walls were framed and attached to the base of the shabin.
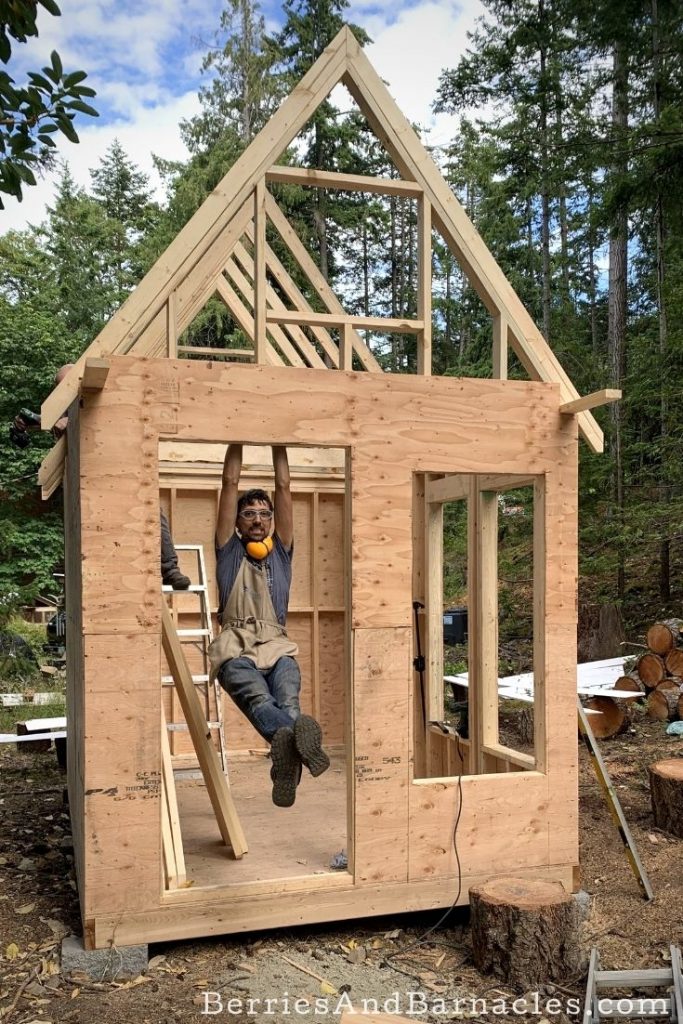
Day 4: Gable ends and rafters
On the fourth day, we put up the gable end and each of the rafters. There isn’t a ridge beam in our design, so the rafters were just anchored to the header.
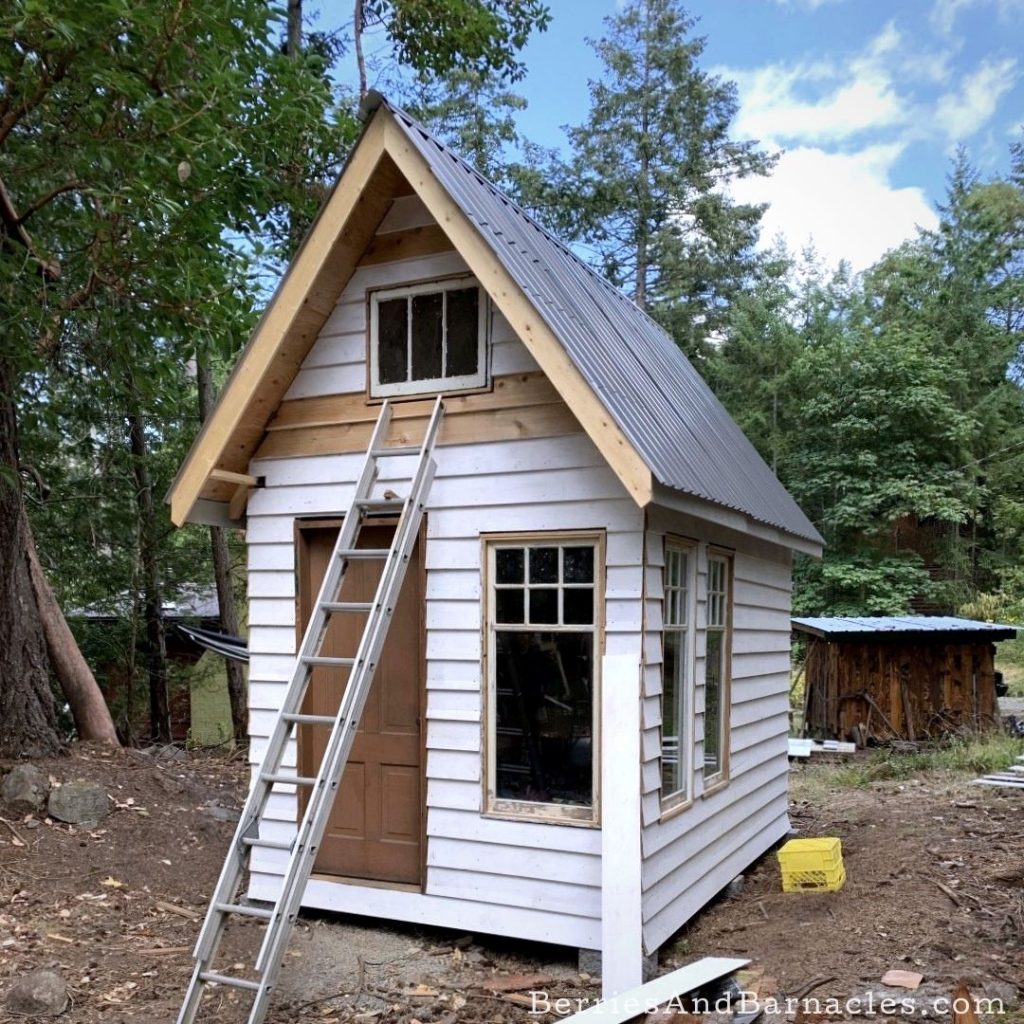
Day 5: Windows, door, and tar paper
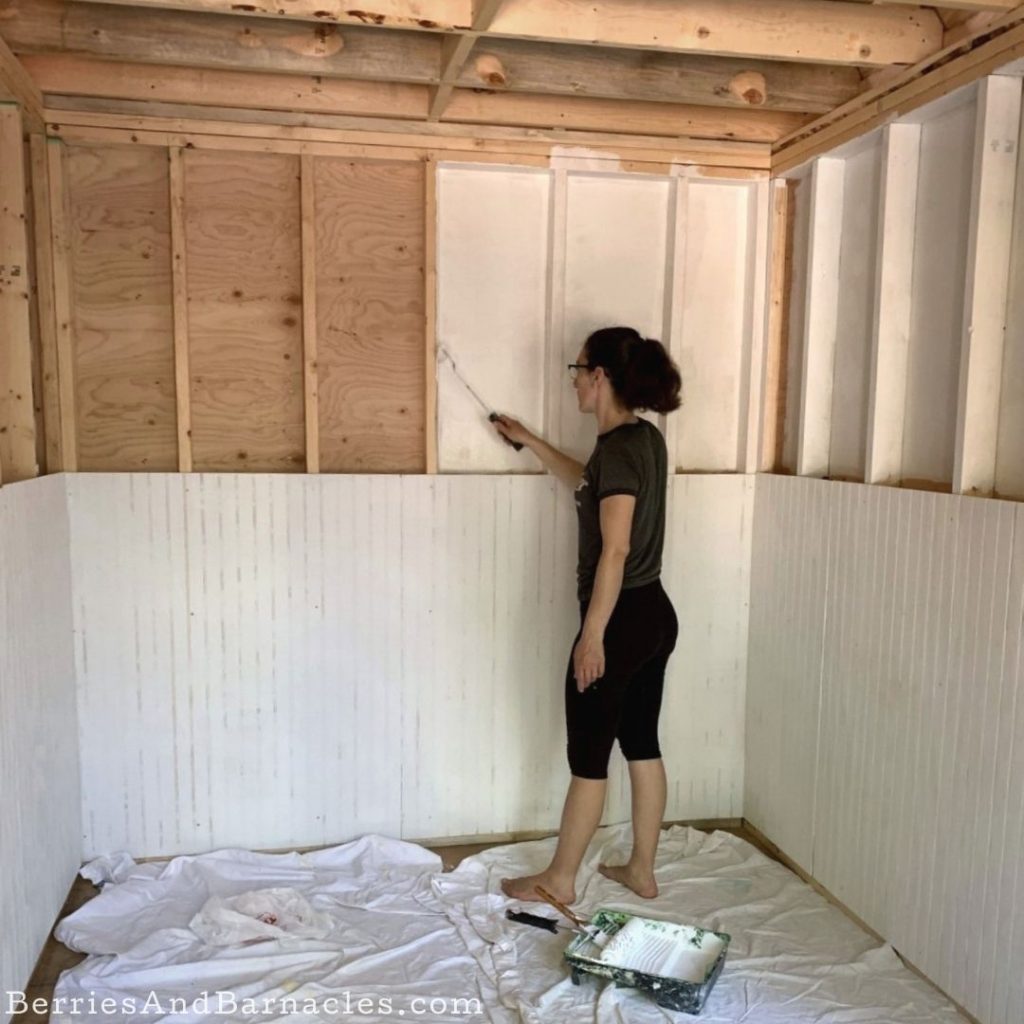
Mikal had pre-hung the windows and doors, which made them easy to install. We then used spray foam to seal any gaps between the frame and space in the framed walls.
Tar paper was used as a wind and vapor barrier. We had the siding prepped and primed but didn’t start putting it up until a later visit.
Day 6: Roofing
Putting on the roofing was probably the hardest part. Mostly because neither Brad nor Mikal had experience with it. However, it was made more difficult because of a mistake in our order. We received 8 x 10ft panels instead of the 10 x 8ft panels that we ordered.
We realized the mistake as soon as we went to pick it up but couldn’t do anything about it since we only had the truck for one trip over to the island. It meant that we had to create a roofing panel out of offcuts, which really wasn’t ideal. But it still keeps the water out!

A FEW HELPFUL TIPS AND TRICKS FOR BUILDING A BUNKIE.
Looking for some advice? Here are a few things we either wish we had known beforehand, or wish we had done differently.
- It’s really handy to have at least one person who knows their stuff. It would have taken Brad and me at least two or three weeks to build the shabin without Mikal.
- If you’re building in a remote location buy at least 1 extra of everything. That way you can keep on building your shabin if something breaks or you make a wrong cut.
- We had a ton of batteries for our drills, however, they only lasted about 3 days. Then we had to beg power off of a neighbor to charge them up. We also charged up our cell phones that way. Thank goodness for neighbors!
- All the other power tools (mostly saws) ran off of a gas generator. We could also charge batteries that way, but it was too noisy to leave it running for longer than necessary.
Building a shabin while camping isn’t for the faint of heart, but if you’re the sort of person who thinks it would be a good idea, then it’s probably for you!
Check out more DIY cabin posts:

You mentioned that you didn’t install a ridge board, what did you install that would stabilize the roof? Also, what size was the cabin?
The bunkie is only 8 ft by 12 ft. This is one of the big reasons why the loft doesn’t need additional support, etc. Also allowed us to fit within the necessary size for planning permission. The roof is stabilized with plywood. Cheers! Emillie