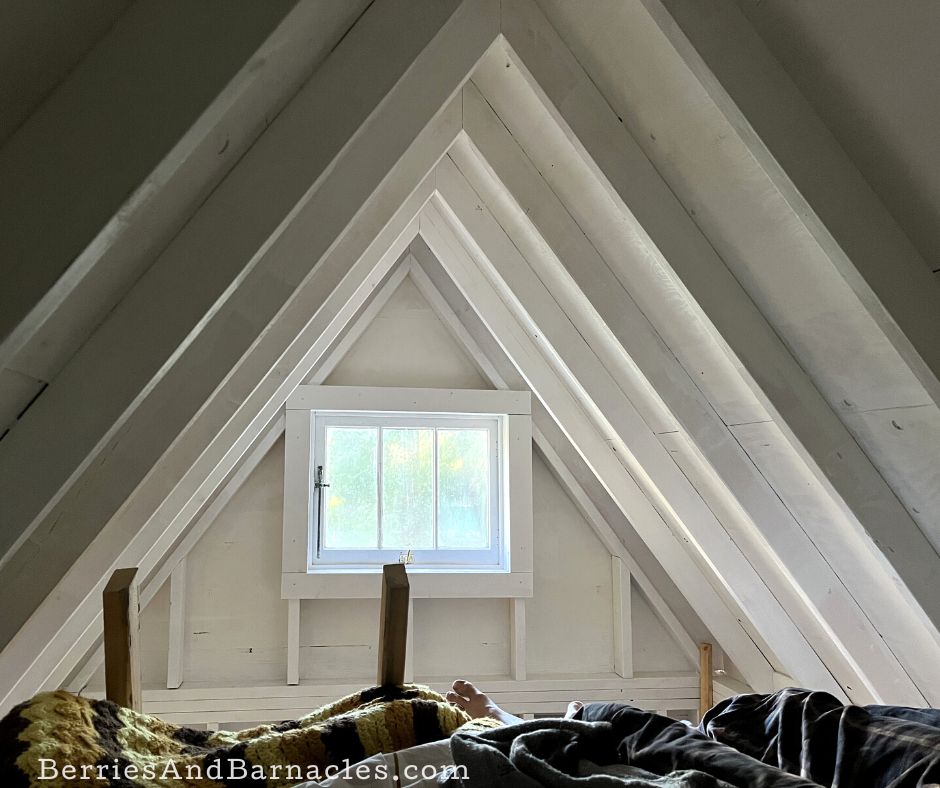
Here are the building plans for our 100 sq. ft. gable roof shabin. It has a 50 sq. ft. loft and openable windows in both gables. A perfect bunkhouse for our family of four.

This is part of a series of blog posts on our self-built shabin. You can find all of the posts here.
THE DESIGN
It took us a whole winter to figure out exactly what we were going to build. We had a few parameters:
- The exterior footprint had to be less than 100 sq. ft. so we wouldn’t need planning permission.
- We’re a family of four so we couldn’t use a design that was built for a single person.
- The addition of a loft was necessary to maximize storage space.
- Our siting had the door opening to the west. We wanted a few windows on the south side and no windows on the north side.
The biggest decision was choosing between a clerestory skillion roof and a gable roof. We honestly went back and forth a number of times.
- A skillion roof has a modern look. It’s a simpler design and easier for water collection.
- A gable roof is super cute and is better in windy locations.
In the end, it was thinking about potential floor plans that helped us decide on a gable roof. It just worked better for our purposes to have the door on the narrow gable end rather than the long clerestory side.
Shabin building plans
We looked at a ton of plans for tiny homes, cabins, and sheds. In the end, we really liked the cottage life bunkie. It was a simple gable shed with a loft.
While it was the inspiration for our design, it wasn’t our final design.
- We wanted an 8×12 interior (for ease of plywood flooring and wall sheeting).
- The loft couldn’t extend over a porch, without having it count towards our 100 sq. ft. so the loft is completely internal to maximize the interior space.
- The windows and doors were all rescued from old houses, so the height of the walls needed to be tall enough for the framed door. And the gable needed to fit the windows.
Brad spent two months reading the local building code and designing a shabin to our particular specifications. Then our friend Mikal, the carpenter who was going to help us with the building, looked over our plans and adjusted them where needed.
The building plans
Here are our plans. They come with a disclaimer.
If you choose to build according to these plans, you will need to make sure they comply with your local building code. You also should use a professional builder to ensure that everything is done safely.
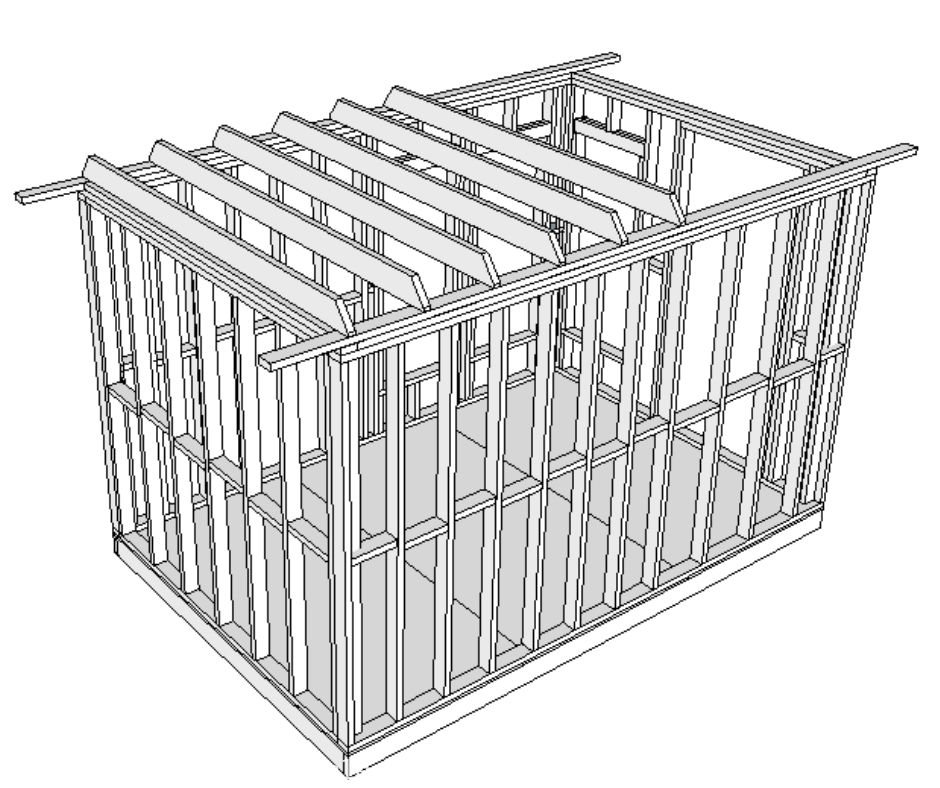

These plans aren’t detailed enough to provide a step-by-step building guide. However, they can help you with your own design. Here are a few more notes:
- We used standard 16-inch centers with bridging.
- The triple top plate supported the gable ends.
- The walls were clad in 5/8″ plywood, the roof was clad in 3/8″ plywood, and the floor and loft floor were 3/4″ plywood. We used good-one-side plywood for all the exposed plywood.
- The base of the shabin was all 2 x 6 cedar, and the loft was supported by 2 x 6 SPF beams.
While Brad created schematics on a computer and printed off paper copies to work from. Mikal redrew the plans by hand, each night based on the work done that day. That way he made sure everything was exactly right. He might have ordinarily used a computer… but we were working at an off-grid site.

Check out more DIY cabin posts:


Fantastic, thank you!