Here are three simple ways to make homemade bunting. Perfect for all your celebrations: birthdays, weddings, baby showers, and more!
I love homemade bunting. It’s so easy to make and has a fun, vintage appeal. It’s also a great way to use up scrap fabric.
Homemade bunting is perfect for so many different things:
- Celebrations: birthdays, baby showers, weddings!
- Gifts: who couldn’t use their own strand of birthday bunting?
- Decor: Perfect for decorating a kid’s bedroom or a sprucing-up campsite.
Zero-waste decorations
The thing about dollar store decorations is that they are pretty much garbage. You blow up the balloons, hang up a “Congratulations” banner, and set out plastic cups on a plastic tablecloth. Then the next day it all gets thrown away.
There is a better way. Paper straws can be composted or recycled. Tissue paper flowers. And homemade bunting!
Three types of Homemade Bunting
Homemade bunting can be as simple or complicated as you want. All that really matters is choosing a bunch of scrappy fabric in coordinating colors.
Here are three different ways that I have made bunting.
1. Rag strips bunting
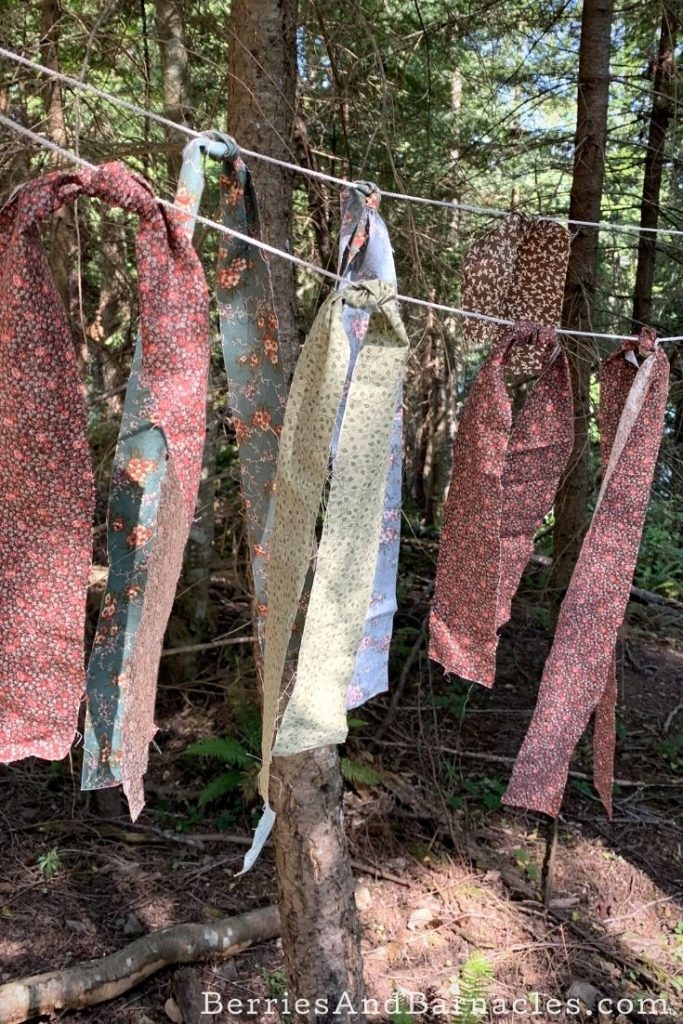
This is definitely the easiest way to make bunting. I love the look of raw edges and the haphazard lengths of fabric.
Method:
Hang a piece of string or rope. Then tie strips of fabric to the rope using a simple overhand knot. It’s really that easy!
It doesn’t matter how dense the fabric strips are… just use what you’ve got and add more fabric whenever you get some new scraps. You can even use old clothes: jeans with holes in the bum, free sports day t-shirts. It’s ideal for any fabric that otherwise would be thrown away.
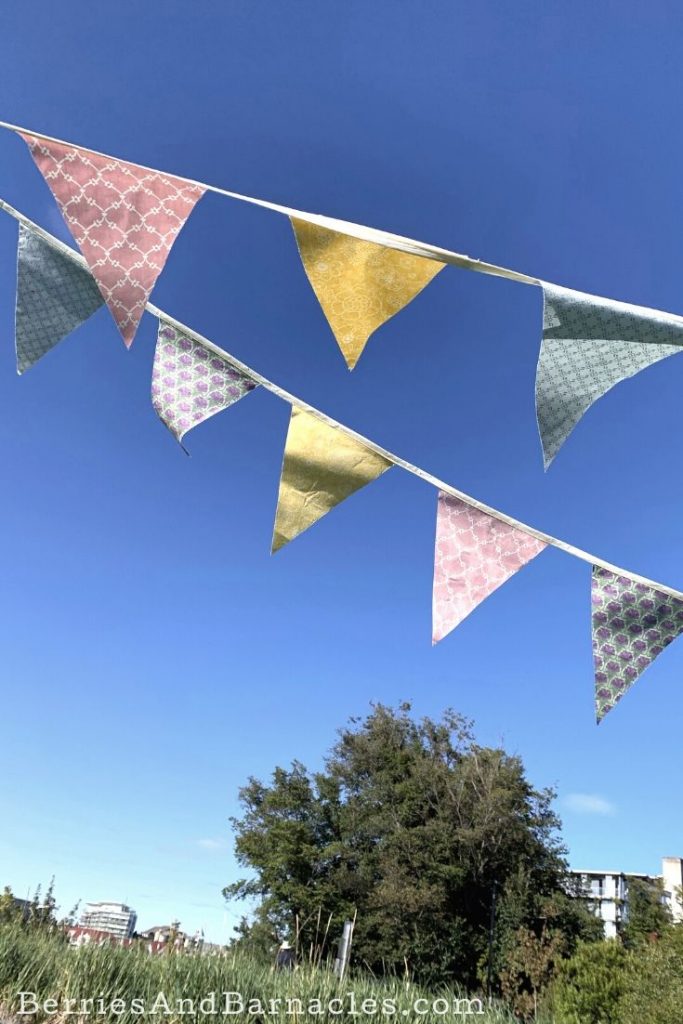
2. Simple Colorful Triangles
The first time I made a banner with colorful triangles, I played around with starching the fabric or using fusible interfacing on the backside. And it really wasn’t worth the effort.
I only have one recommendation, if you want the banner to look good on both sides, use fabric that has some color on the wrong side. Most quilting fabrics do… just watch out for fabric that has a print on the front side only.
See the picture at the top of the blog post for my colorful triangles bunting.
Method
This type of banner is made by cutting out a bunch of triangles and sewing them into double-folded bias tape. You can make large triangles or small triangles. You can have them strung one right after the other or leave space between them. It’s really up to you.
Here’s what I did:
- Cut out a triangle pattern from a piece of paper. (My triangle had two sides that were 11-inches long and a short side that is 8 inches long).
- Use the pattern to cut out all of the fabric triangles.
- Then sew the triangles to the banner leaving 3-inches between each triangle.
- The ties at the end are 20-inches long.
- My strand of homemade bunting has 18 triangles and a total length of around 20 feet.
3. Celebration Banner

Our “Happy Birthday” banner is definitely the most complex type of homemade bunting. It’s also a banner that we’ve used 4 times a year, each year since I made it. So actually it gets quite a bit of use!
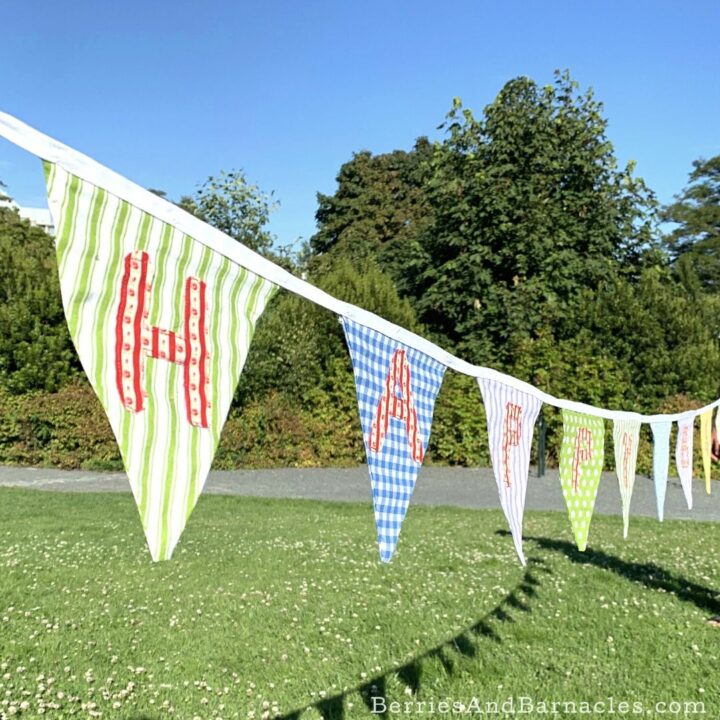
Celebration Bunting
Three simple ways to make homemade bunting. Perfect for all your celebrations: birthdays, weddings, baby showers, and more!
Materials
- Scrap Fabric
- Double-folded bias tape
Instructions
- See the sections above for two easier bunting options. One is a simple knotted bunting. The other is plain sewn triangles. This is the most complicated option and involves appliquéd letters.
- Cut two triangles for each of the bunting triangles. This is fully double-sided bunting, so you need one triangle for the front side and one for the backside. I made the triangles 11-inches long on the two long sides and 8-inches on the short side.
- Cut bulky letters out of a contrasting fabric.
- Applique the letters to the front sides of the triangles.
- With the right sides together, sew the triangles together along the two long sides. The short side can remain open.
- Turn the triangle right side out and iron flat.
- Sew the triangles into the doubles folded bias tape, leaving 20-inches of tape at each end of the banner for tying.
Check out more party projects:
Leave a Reply