How to make birdseed feeders for gifts or party favors. Perfect for Valentine’s and weddings with this shelf-stable recipe.
We’re pretty keen on maintaining a low-waste (zero-waste) lifestyle. Which is pretty easy most of the time. We’re lucky to live in a community with a number of bulk food stores and places to refill bottles of soap.
However, it’s hard to keep up with these lifestyle choices during holidays and parties. It’s like Halloween, Valentine’s, and birthdays have to be celebrated with candy, throwaway trinkets, and excess packaging.
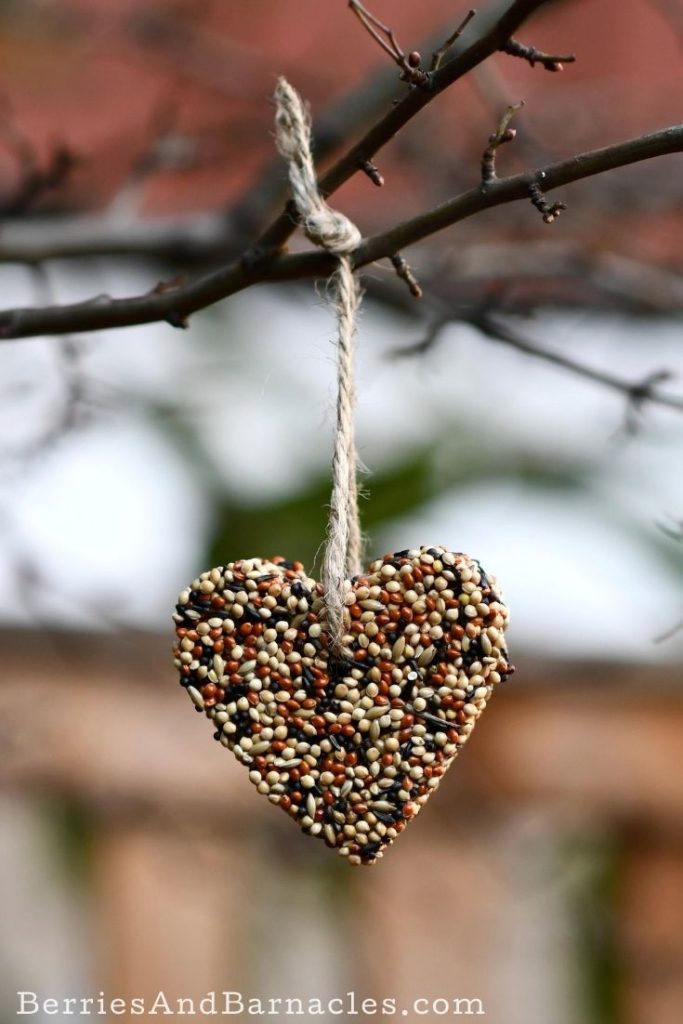
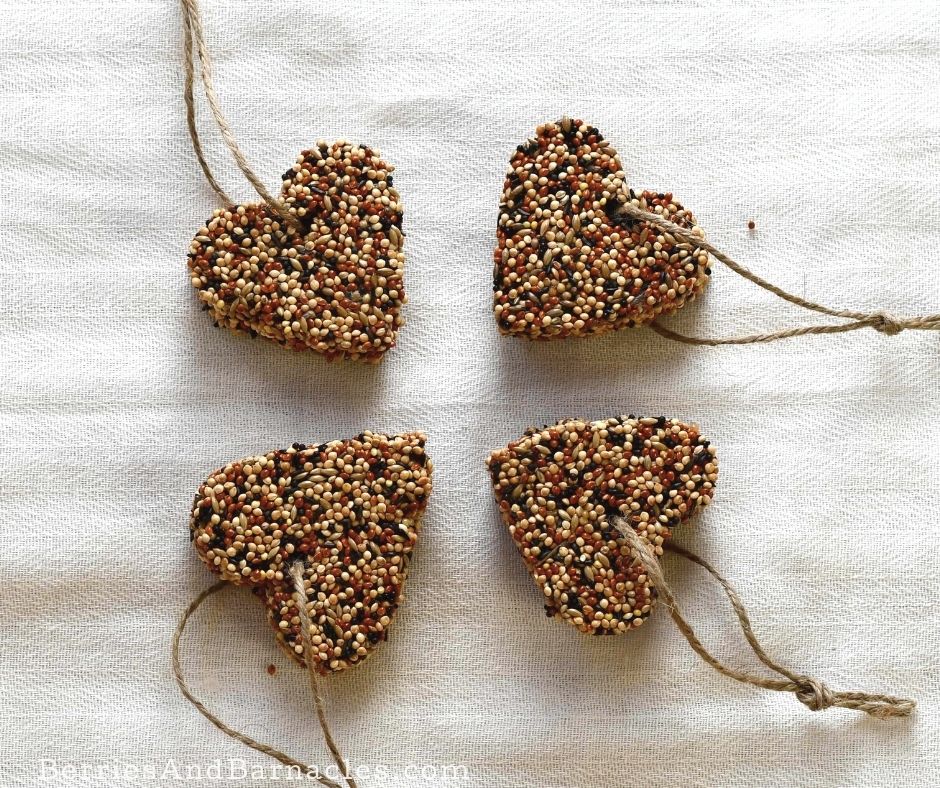
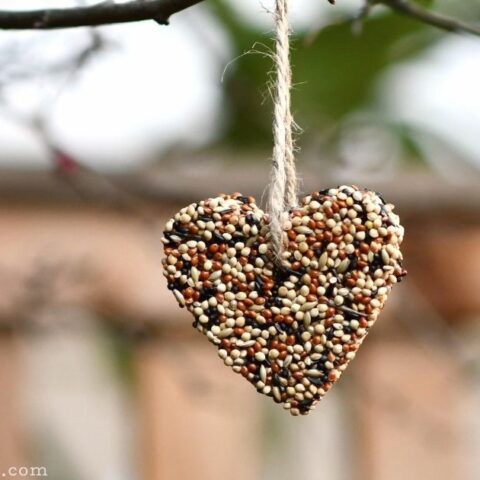
These homemade birdseed feeders are a fun, crafty, and affordable alternative. We made ours for valentine’s, but they’re perfect for wedding favors and other celebrations. A zero-waste gift that helps to feed songbirds!
Homemade birdseed feeders
Una actually came up with the idea of making homemade birdseed feeders. She’s a real naturalist. So the idea of giving her classmates songbird feeders for valentine’s really was appealing.
She and Brad worked on it together using this recipe and this method. The only trick is that despite following the instructions, our homemade birdseed feeders started to mold after about 48 hours. After a bit of searching, I discovered that there were a ton of websites recommending these recipes, and just as many people dealing with mold issues.
So we refined the technique a bit and created a shelf-stable, mold-free homemade birdseed feeder!
Homemade Birdseed Feeders
How to make birdseed feeders for gifts or party favors. Perfect for Valentine's and weddings with this shelf-stable recipe.
Materials
- 2 cups of water
- 4 envelops (7 g) of unflavoured gelatin or 2 1/2 tbsp of powdered gelatin
- 8 cups of song birdseed (smaller seeds are better)
- Cooking oil
- Jute twine
Instructions
Mixing the birdseed
- Measure 1 cup of cool water into a large bowl. Add the gelatin.
- Boil the remaining 1 cup of water and add it to the bowl. Stir until the gelatin is dissolved, about 2 minutes.
- Stir in the birdseed, mixing so that it is thoroughly coated in the gelatin. Let it sit for a few minutes then stir again. Do this a few times so that the birdseed is evenly coated by the gelatin.
Forming the birdseed cakes
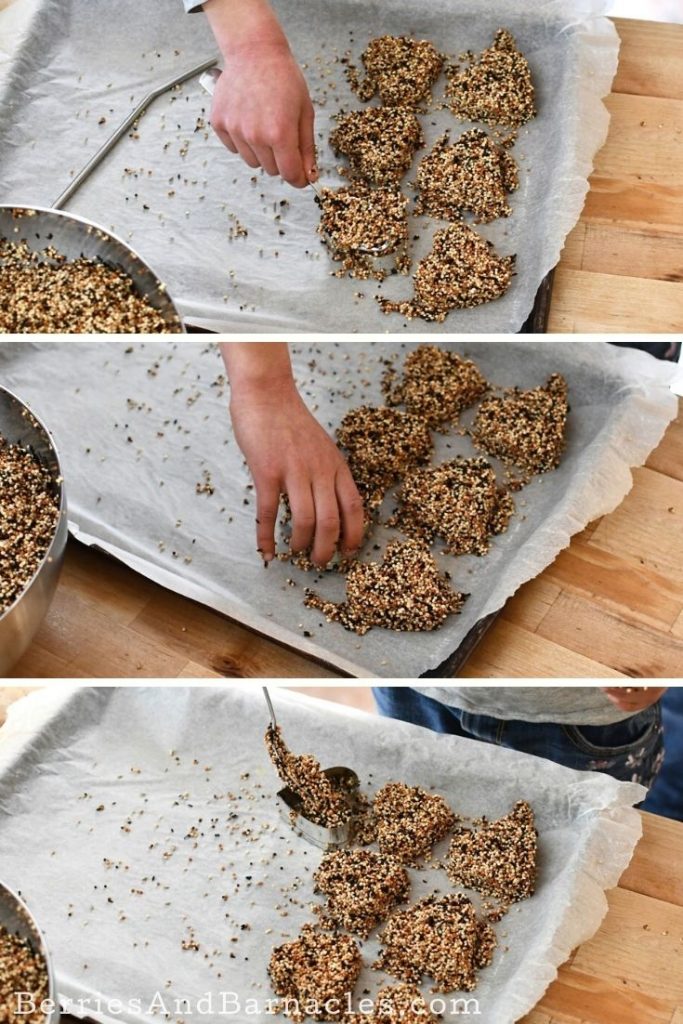
- Dip the cookie cutter in cooking oil to prevent the birdseed from sticking.
- Place the cookie cutter on a baking sheet lined with parchment or wax paper.
- Fill the cookie cutter with the birdseed mixture. Dip a spoon in cooking oil, then use it to pat the birdseed into the cookie cutter so it is nicely packed in and flat.
- Dip a straw in cooking oil, then use it to make a hole in the birdseed ornaments.
- Carefully lift off the cookie cutter, and make another ornament.
Finishing
- After you’ve finished making the birdseed feeders, leave them to set for at least 4 and up to 24 hours. If you live somewhere snowy and want to tie up your bird feeders and hang them outside right away, they don’t need to dry first. The cold will prevent them from molding.
- To finish them for storage, pop the baking sheets in the oven. Turn the oven on to the lowest setting (170 F on my oven) and prop the oven door open with a wooden spoon.
- Leave them to dry for 2 hours, then carefully turn over the ornaments, and let them dry for another 1 to 2 hours. The ornaments are finished when they are fully dry. You can check by pressing in the middle of a large ornament. It’s firm when fully dried.
- Use the jute to make a loop to hang it with. We found that threading the jute onto a large wool needle helped with getting it through the holes.
Check out more party projects:

Leave a Reply