Follow these simple instructions to make your own wooden stilts! Once you’ve learned how to walk on them, try playing one of the four fun stilt games.
Growing up, my siblings and I each had our own pair of wooden stilts. Balancing took a bit of work at first, but we were motivated, and once we got really good at them we were able to go for walks around the neighborhood and play games on our stilts.
Walking on wooden stilts
Walking on wooden stilts is great for improving balance and coordination. It gets you using muscles that you don’t normally use, particularly the stabilizing core muscles.
There are two main ways that people walk on wooden stilts.
- Most people start by trying to hold onto the posts, then stepping up onto the footrests. It works, but it’s not as stable and you probably won’t be able to take more than just a few steps.
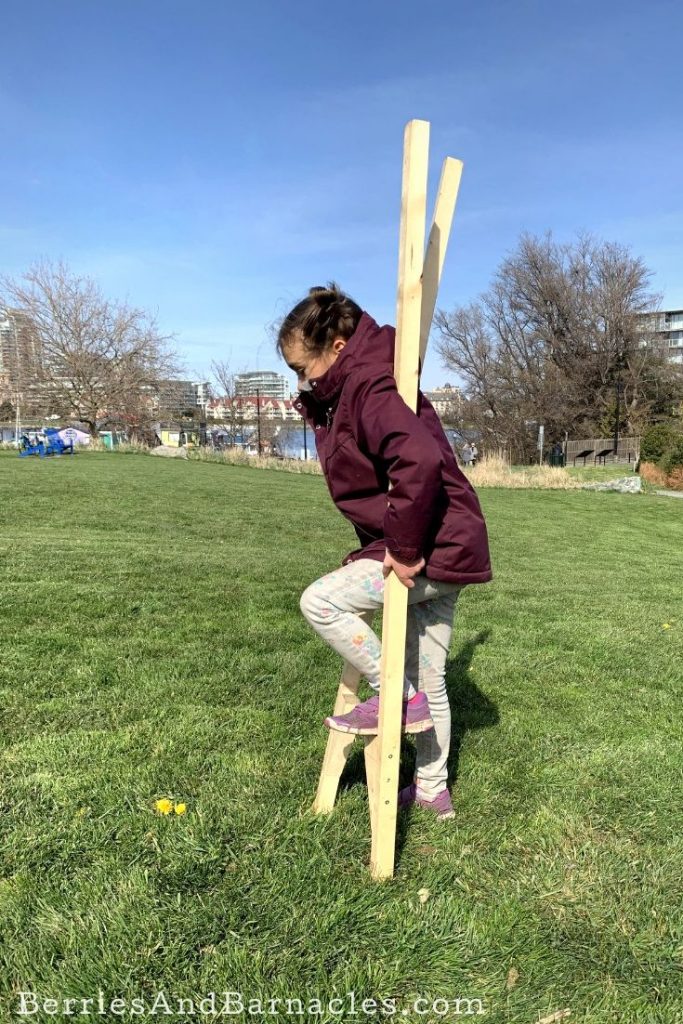
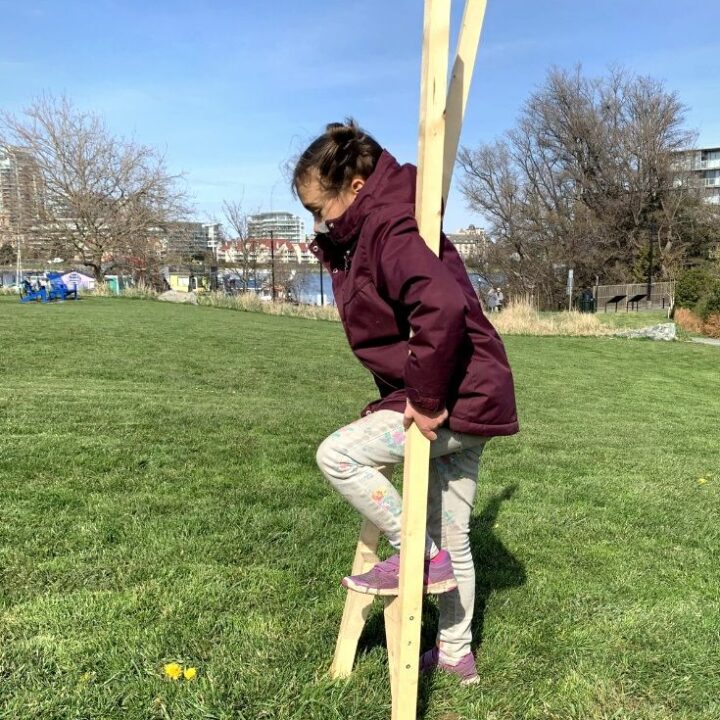
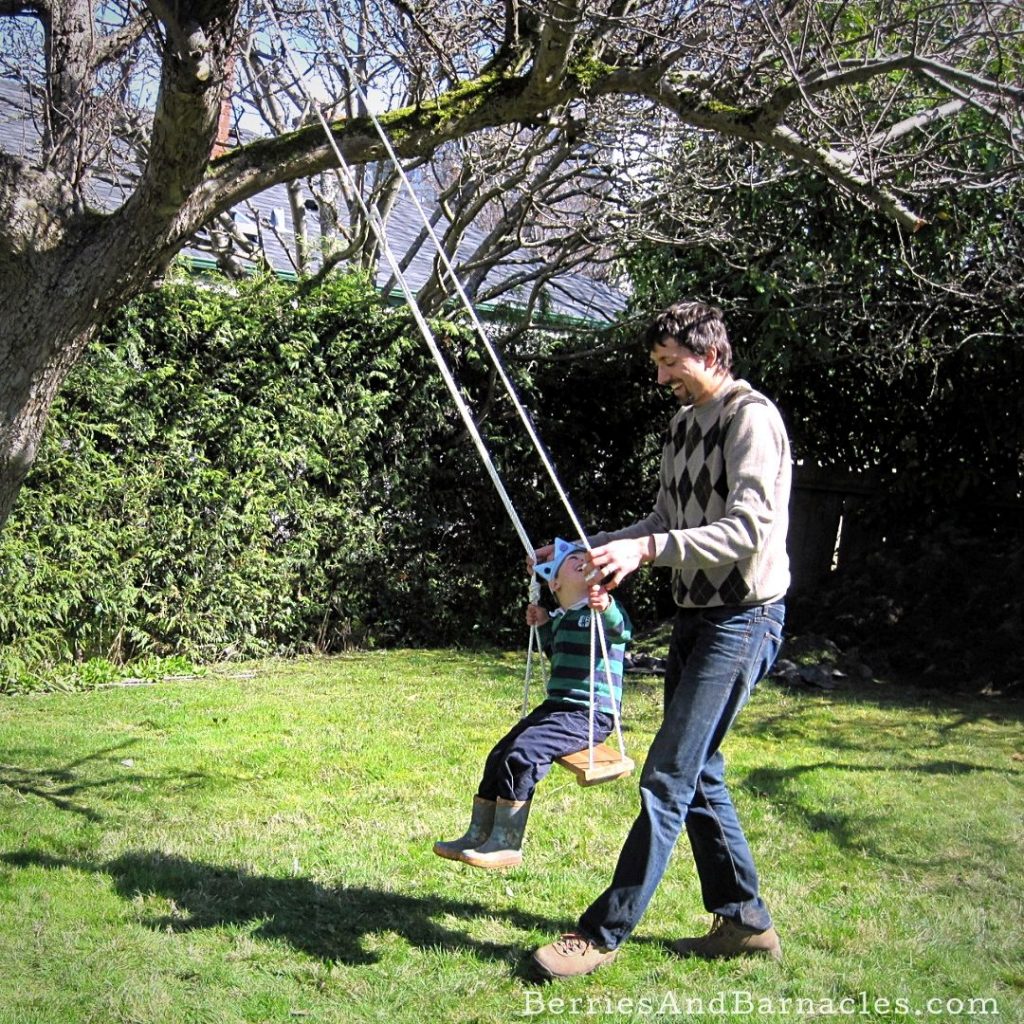
- For a better stilt walking experience, wrap your arms around the posts, stabilizing them against your body. Held that way you should be able to balance for a good long time. I’m not particularly into videos… but you can probably get a good idea of what I mean from the photo above.
The best thing about old-fashioned wooden stilts is that they are SO EASY to make! All you need is a handsaw, a screwdriver, and about 10 minutes. You’ll probably spend more time figuring out how to walk on them!
Fun stilt games
Once everyone has gotten good at walking around on stilts, there are a bunch of fun games you can play. Just be sure to play safely. I recommend playing on grass, and making sure everyone is at a similar skill level.
- Racing: Racing across a grassy lawn is perfect for beginners. You can race to see who can get the furthest, who can take the most steps, or who can balance for the longest. Each of these involves slightly different skills, so try all three!
- Obstacle course: Make a simple obstacle course. It’s not easy to step over sticks, walk around an orange pylon, or in a straight line next to a rope.
- Tag: Stilt tag is slow-moving and tricky! The rules are simple: all steps must be taken on the stilts, but you can let go of the stilts to tag someone. No tackling allowed.
- Soccer: For more skilled stilt walkers, try playing a game of soccer! All the usual rules apply.
Old-Fashioned Wooden Stilts
Follow these simple instructions to make your own wooden stilts! Once you’ve learned how to walk on them, try playing one of the four fun stilt games.
Materials
- Posts: Lengths of 2″ x 2″ are used for the posts. We used 5’10” lengths as an average stilt height that worked for most people. We also made a pair of extra-long stilts for Brad that were 6’4″. Then we made a short 5’0″ pair for Una and other younger children.
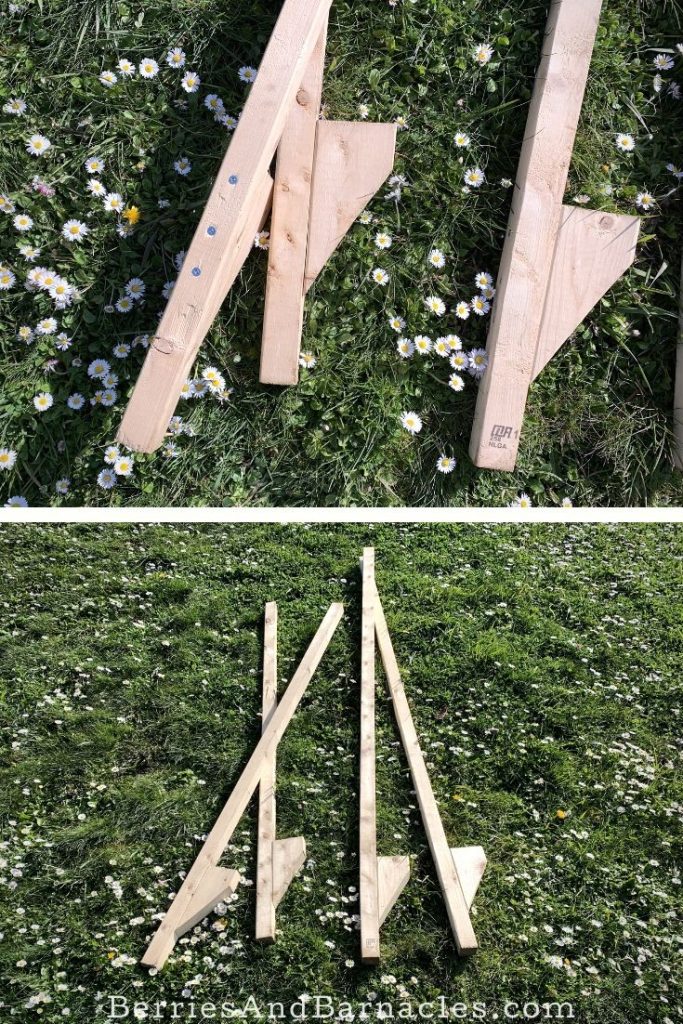
- Footrests: The footrests are made out of blocks of 2″ x 4″ that are 16″ long
- Screws: You’ll need six 2 1/2″ screws for each pair of stilts. And I recommend galvanized outdoor screws, so you don’t have to worry if you accidentally leave your stilts out in the rain.
Instructions
- Decide how long you want the stilts to be. In order to use them properly, they need to reach just above your armpit. However, if they are too long then they become unwieldy. We made 4 pairs, a short 5’0″ pair for Una, a tall 6’4″ pair for Brad, and two average-sized 5’10” for Max and me. Trim the 2″ x 2″ lengths so that you have two posts of the same height.
- Cut the 2″ x 4″ down to 16″. Mark off 2″ from either end of the block, then draw a diagonal line between the two points. Cut along the diagonal line creating two footrests. You can get a pretty good idea of what I mean from the photo above.
- Position the footrests so that the flat top is one foot from the bottom of the post. You could make them lower if you’re making stilts for kids under age 10, but 1-foot seems to work for adults and kids above age 10.
- Using a drill, tap 3 holes through the posts into the footrest. Make sure to do it high enough on the footrests to avoid going through the narrowest part.
- Screw the footrest to the posts, and you’re done!
Check out more fun projects:
Leave a Reply