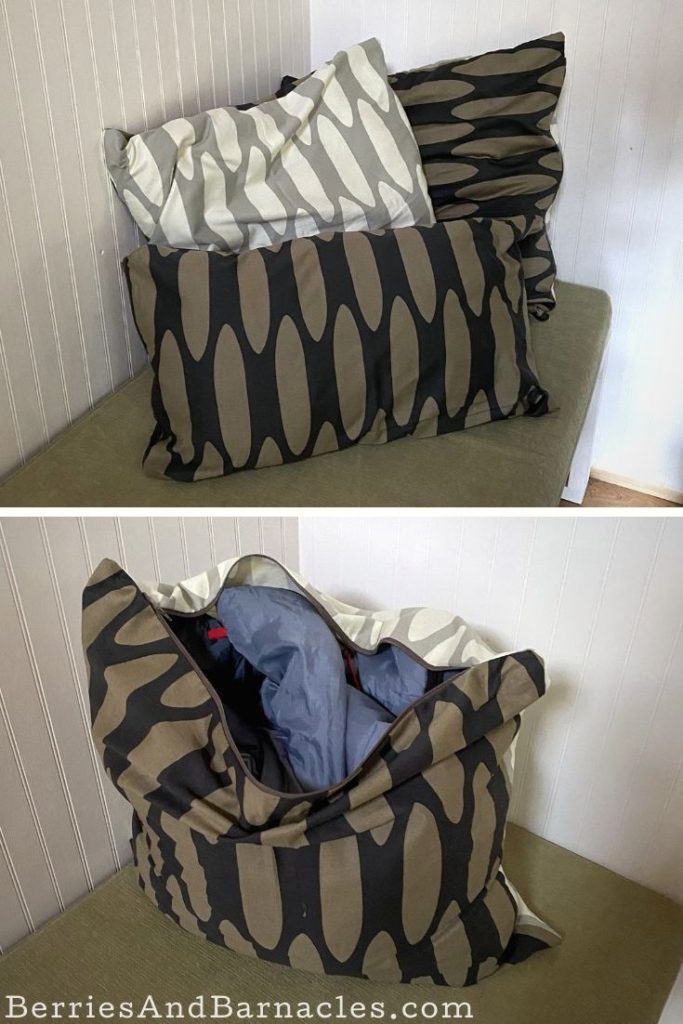
It’s hard to know what to do with all the bedding when your bed doubles as a couch. Typical solutions include folding up the bedding and stashing it in a drawer or chest. But that’s not exactly practical in a very tiny space. That’s why we decided to use stuffable pillowcases for our bedding!
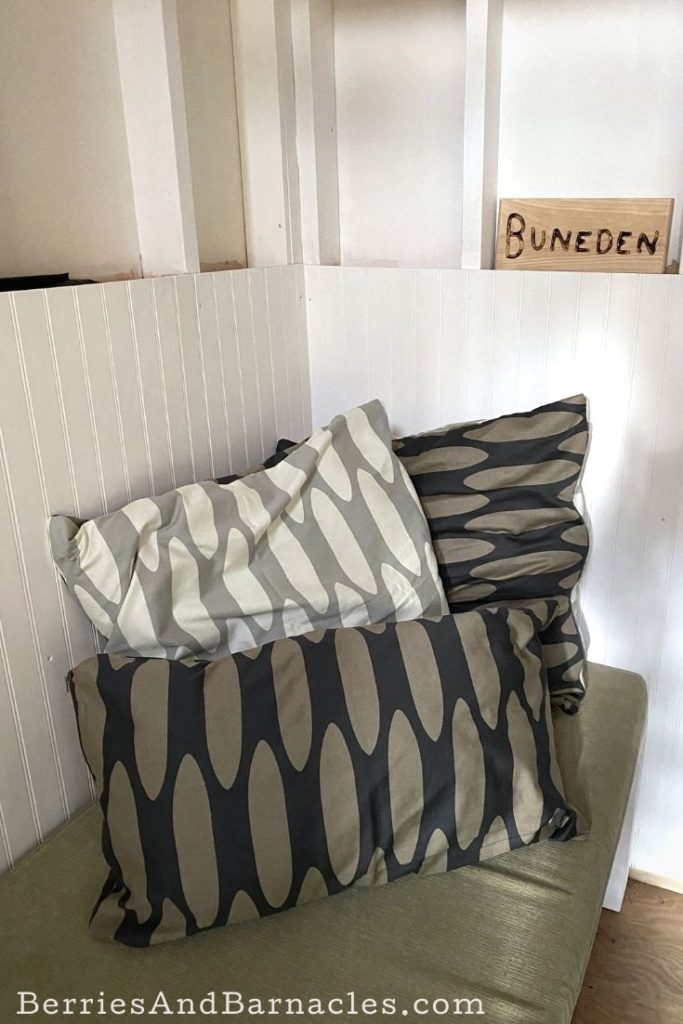
It’s the perfect solution for any bed that needs to disappear in the morning!
- It’s ideal for tiny homes, boats, and RVs.
- You can even use them in tents for easy camping clean-up.
- Large throw pillows are always handy to have around. Why not let your bedding turn into fun and flexible furnishing?
- Stuffing the pillowcases is so easy that even my kids will do it. (And that’s saying something!)
- It’s the perfect way to store unused bedding.
Homemade Stuffable Pillowcases
There are a few different places to buy stuffable pillowcases, however, it’s really easy to make your own. I’m not even good at zippers, and I managed it (imperfectly…).
The only tricky part is making sure your pillowcases are large enough for the bedding. Buying generic throw pillowcases won’t work for sleeping bags and duvets. You need these to be big enough that stuffing them doesn’t take any effort.
The instructions are for a large square pillowcase. I made a 28-inch by 28-inch square for our sleeping bags. A thick duvet may need a 36-inch square. I also made a smaller pillowcase with the remaining fabric. We use it for our sleeping sheets and summer-weight blankets. It’s the perfect bedding storage solution for our bunkhouse daybeds!
Really, the pattern is so simple that it can be used for any size pillowcase.

Stuffable Pillowcases
This stuffable pillowcase is designed for camping, RVing, or tiny homes. It's perfect for storing bedding when your bed needs to double as a couch!
Materials
- 1 yard of fabric. (I recommend choosing an upholstery fabric or something a bit thicker that will help to keep the bedding clean. It’s also handy to use a washable fabric).
- Standard 22-inch zipper. (The best choice for frequent use is a non-separating coil zipper).
- Thread
Tools
- Sewing machine (because sewing by hand is time-consuming).
Instructions
This is so easy, I sort of feel silly writing down the steps! But in case this is your first time sewing something… here’s what you need to do.
- With the right sides of the fabric together, sew around three sides of the pillowcase.
- Insert the zipper into the last side. I did this very unprofessionally, by simply matching up the outside edges of the fabric and zipper and sewing them together. Then I did a second seam that was much more careful right along the side of the zipper. I don’t have a zipper foot on my sewing machine, so my zippers are never perfect. If you’d like a really professional-looking pillowcase zipper, then I recommend watching this video.
- After inserting the zipper, unzip it, and sew together the remaining bit of fabric on either side of the zipper (basically inserting the zipper into a pocket).
- Turn the pillowcase right side out. Iron everything. And get ready to stuff your bedding!
Check out more DIY cabin posts:

Leave a Reply